Bilingual, Trilingual ? Is that even possible?

duolingo-banner

Have you heard of Duolingo before?

I love it.

Duolingo is a cross platform (Web, IOS, Android) application where you get to learn new languages. It feeds you words and images at the beginning to get you familiar with the vocabulary, then it will feed you fill in the blanks and short sentences that you need to translate until it makes you repeat after it and even construct sentences in the target language. How much you say? Completely free.

As presented in the video, it breaks down the information in types of stuff to learn (food, animals, plural, etc) then categorize those in levels (basic 1, basic 2) that you need to pass to go to higher levels.

Screen Shot 2014-04-06 at 4.45.00 PM

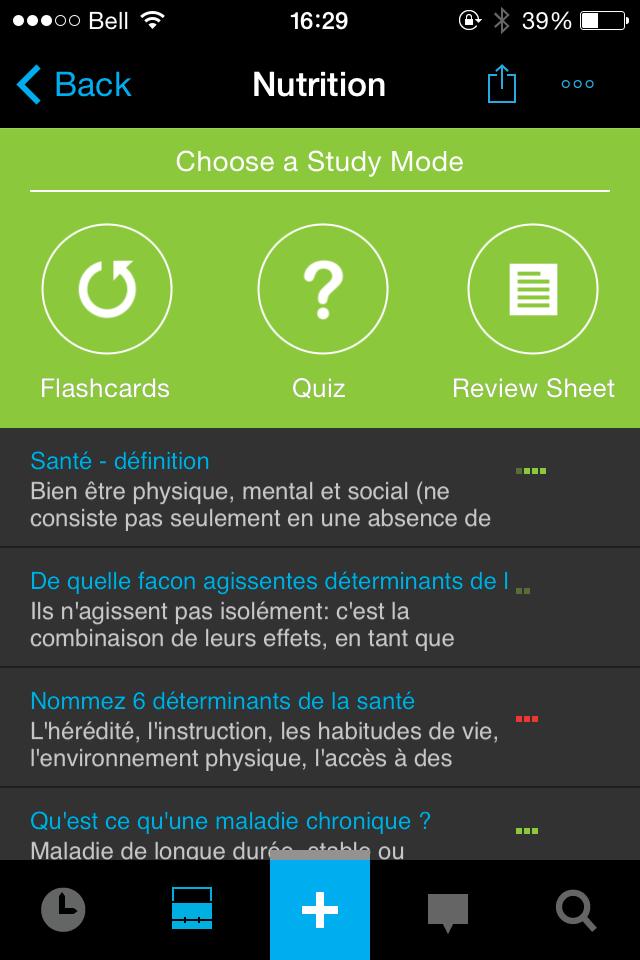
These are the “levels”. As you can see there is Basic 1 and 2, Phrases, Food, Animals, Plurals, Idioms (that I bought with lingots) and it goes up and up until you learn every Spanish skill you may need.

Screen Shot 2014-04-06 at 4.45.18 PM


This is the interface that you get once you choose a level. You have a few lessons to go through before completing the skill.

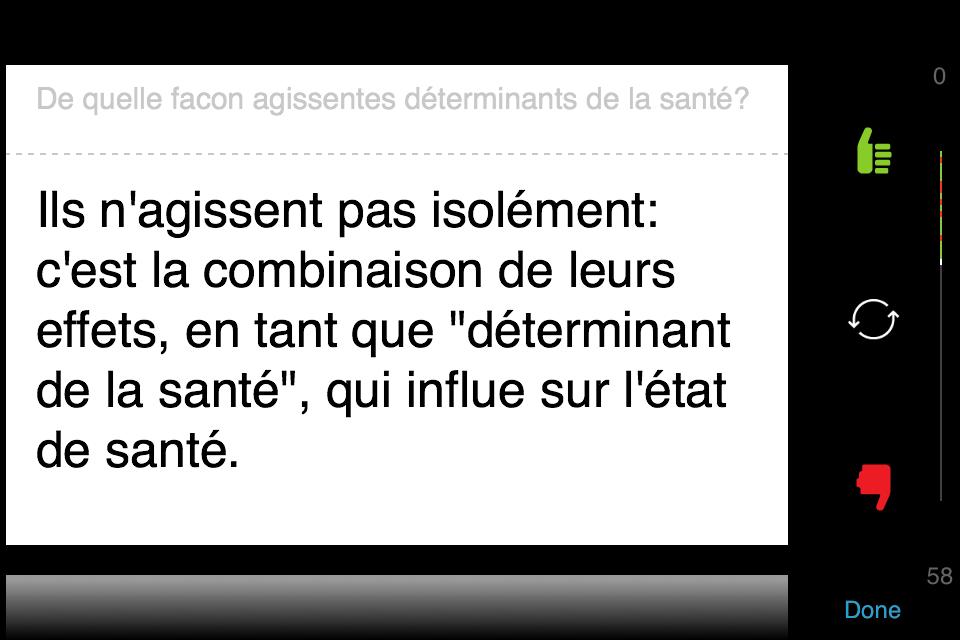
At first, you are shown images that you must match with the correct vocabulary word. This helps build your vocabulary as well as your confidence in your ability in learning the language.

Screen Shot 2014-04-06 at 4.47.47 PM


You click on your answer then click on check. Your answer will then be corrected (the grey bar will turn green if it is correct or red if it is wrong). Hence, feedback is extensive (it may become yellow if you forget an accent or write a typo), direct and accurate (many users have studied this before).

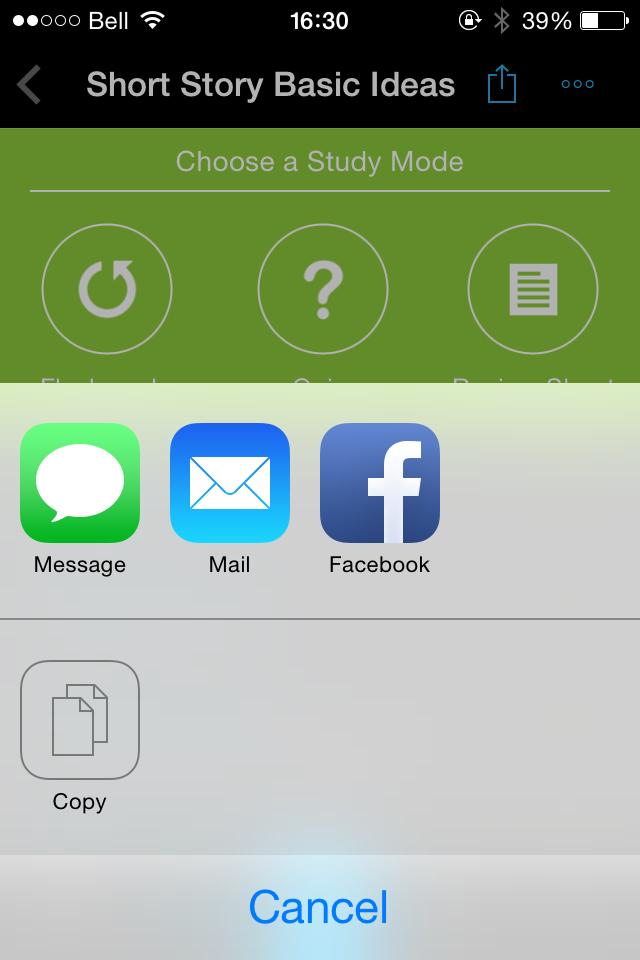
If you are unsure why your answer is correct or wrong, you can click on the forum button for that question, which appears on the bottom left of the page.

Here’s an example of forum:

Screen Shot 2014-04-06 at 4.59.04 PM

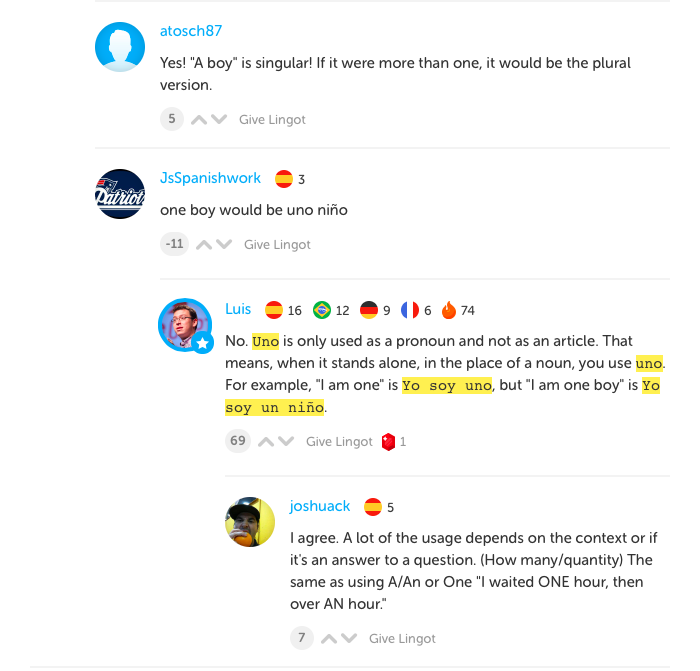
This is not the only help you get, though


Screen Shot 2014-04-06 at 4.48.06 PM

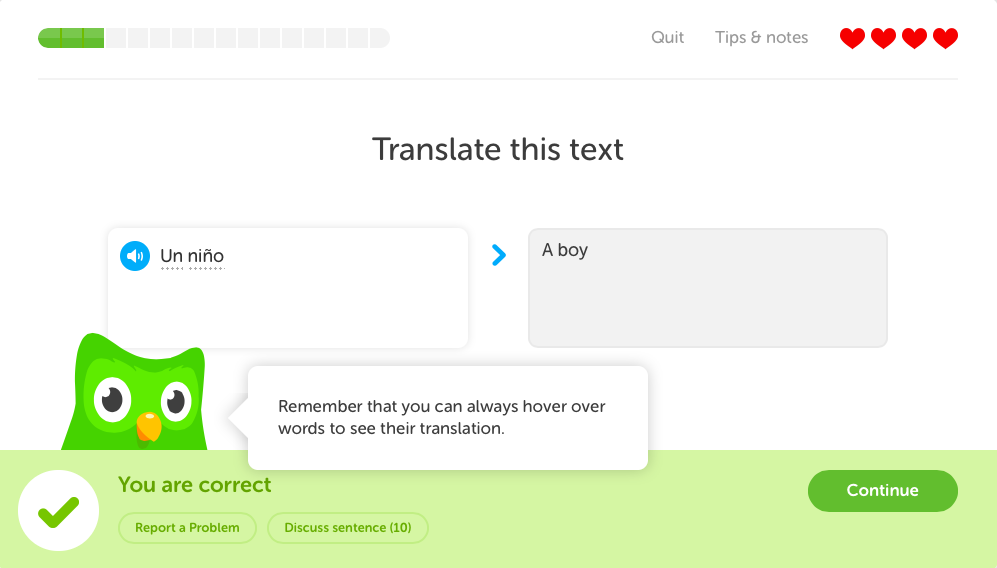
Throughout your learning, your DuoLingo bird will keep you company and it will give you tips and tricks on how to use the application. As the bird says in the picture, you can hover over words to get a few different translations. Then, if you still aren’t sure, you can click on the word to get to that word’s page and the dictionary definition.

You lose hearts when you give a wrong answer, just like in a video game, but you get special rewards such as lingots (diamonds) when you complete a lesson with full hearts.

As is the case with many learning applications (see my StudyBlue post), there’s a bar on the upper left corner that keeps track of your progress and the good and bad answers you gave.

There is also an overall learning progress bar that keeps track of your level of training, the number of words you’ve learned and the experience you’ve gained since the beginning.

Screen Shot 2014-04-06 at 4.45.37 PM


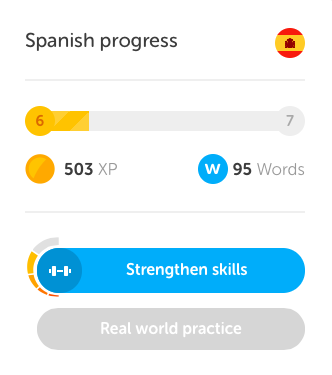
As is the case in levels..

Screen Shot 2014-04-06 at 4.45.29 PM


….DuoLingo gives you the opportunity to strengthen your skills, whether it be for the specific level or for the whole thing. It keeps your brain from forgetting things, you know?

This also comes in with the social level of DuoLingo. Just like in video games, the social side of the game may be able to keep you doing this a longer time than what you normally would in a regular class.

Screen Shot 2014-04-06 at 4.45.45 PM

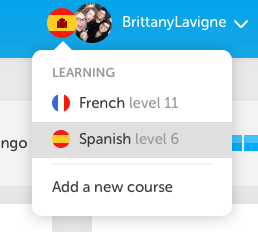
What happens if you’re a learner who has already begun language classes? Do you really need to go through the painful process of beginner vocabulary again? Waste all that precious time?

No. You can simply take the test at the beginning to see what level you are. That’s how I acquired a level 11 in my French right off the bat.

Screen Shot 2014-04-06 at 4.46.01 PM


Plus, if you feel like you’ve been unfairly categorized, or that you now learned the half of the “skill level” which you didn’t know, you can test out of the skills and keep on learning new stuff.

Why did I bother getting my French tested if it is my native language? Well, I wanted to see if the application was worth anything. I mean, it would be easy to simply fool us into thinking we’re learning something when we’re actually learning Elvish from Lord of the Rings you know?

Legolask


Plus, is there no better way to test the way the information is presented if you already know the correct answers?

Well, I was pleasantly surprised. Everything was well-presented, the information made sense and it was nicely and coherently presented.

Now, let’s see what others have to say about it:

Many of the positive reviews, as we have seen, if you watched the videos anyway, include: completely free, similar to the level of Rosetta Stone without the price, hassle or problems that come with it, useful to brush up on language skills or to be prepared for class beforehand, video game feel, use of visual and audio input, oral and written output, straightforward and easy interface.

Many of those positive notes are found in this video, but there is also an important note: speaking exercises do not seem to be supported by some languages OR the android application. You’ve been warned.

All and all, this is a great application, and it’s free!


Now, let’s get down to business. How exactly can we use a teaching application in class?

Well, your students could have to do levels on this instead of homework. Or, using the flipped classroom model again, they’d learn and practice stuff on the DuoLingo application then come in class to consolidate and practice those skills again. This application is also pertinent as a support for student-presented content (oral presentation) which will then be practice individually at home, for it to be lastly re-introduced in class by yourself, the teacher.

Another different approach to this application is the fact that you put yourself again in the shoes of the learner. Ever since I’ve started learning Spanish with the DuoLingo application, I’ve been more careful to brush up on my lesson plans and make everything extra clear and add in a few repetition. I get back to knowing what it feels like not to understand everything and I feel the dependance I have to a teacher again.

We tend to forget what it is like to be a learner, right?

Flashing my cards

Many of our students highlight the texts they read, whether it be full-blown-fluo-yellow or a coded-colour system that they got lost into. Hell, I did it too, from kindergarten until I got my diploma. Highlighting makes total sense, right? It keeps the information clear, you don’t need to reread the whole thing, and you can copy everything on another document to study it.

What if I told you we messed up?

Science seems to point out that no, highlighting isn’t efficient. Heck, rereading isn’t helping much either. We clock in way much more time than need be when we use those techniques. Indeed, it is categorized under “the least effective methods” with regards to learning.

I feel like I’ve just been robbed of all the time I’ve spent reading and highlighting …

It seems that one of the most efficient technique is : creating queue cards

Queue cards help us studying chunks of information for a short period of time distributed on a long period of time. Plus, it takes the good part of highlighting, which is focus on the important material, and makes it better.

Queue cards could ressemble something like this:

 NF Card 1 NF Card ans NF Card quest

On one side you have a question (right picture), on the other side you have an answer (middle picture). These are written by hand, and they add up to quite a big amount and space if you work a lot with them (left picture).

These help the brain focus on important chunks of information while testing if you remember them or not. They can easily be used in a group to study before a test by putting the pile in the middle of the table and asking one by one a question to someone else. The oral input as well as visual input help the brain link the information together and remember more effectively.

However, as has been the talk on this blog before, paper ressources get bulky, they are fragile (see the torn corners on the first picture?) and they aren’t ecological, what with the use of so much paper and ink. Plus, it’s quite hard to share them with your friends if you need them at the same time, to the purpose of studying for the same test on the same day. Hence, you can’t really share your ressources with those who matter.

The electronic era has an answer for this as well (doesn’t it always?)

It is called: StudyBlue.

Studyblue is an application where you create online flash cards. It’s interface is a mix of black and blue that is pleasing to the eye. *note: the next pictures will be the iPhone interface, but the video after my presentation will present the iPad interface.

SB opening

As you can see in this picture, you create an account or you join with Facebook to be able to sign in. It will create a personalized account for you that you will be able to access on any device and which is your own personalized cloud storage for your flash cards (called backpack).

SB 1

The first step to creating your own personalized flash cards is to press on the blue cross at the bottom. This is the screen that will pop up. You can write in all the relevant information for you and anyone who would like to have access to your cards. This will create a class and queue cards will be categorized by classes.

Classes are also the way for you to search the users’ database for queue cards. You simply type either you course code or your teacher’s last name in the field, after you entered which school is yours, and it pops up available registered queue cards. Therefore, the more your community is involved, the better learning everyone can benefit from. The databank to choose from is already quite big!

SB 2


This is what your backpack looks like. It is clean looking, organized, and hey, it doesn’t weigh anything at all!

On the right hand side, you can see your average score you got when studying these (we’ll get to this later) and how your progress is going (if you started at 20% and went up to 78%, you’ll get a curve like the one next to “Study Sounds Linguistics”. If you get a good score at the beginning and slowly go up, you will get a curve a bit like “Short Story Basic Ideas”.) The progress graph is quite useful to keep track of where you’ve come from and how you are doing now, whether it be better or worse, which is something you can’t exactly keep track of when you use pen and paper.

When you begin studying, you have a few options as whether you want to use flashcards, a test or a review sheet. Plus, you can choose the number of cards you’d like to study and you can determine what type of cards you study, i.e. the ones you have the most trouble with or the whole thing.

Here are the options:

SB 3

If you choose flashcards, here’s what’s next for you:

SB 4 SB 5

 This is how your queue cards look. You have the question (left) and you simply tap the card (or the arrows) to flip it. Then, you can either do thumbs up or thumbs down depending on if you answered correctly. Furthermore, the question appears on top, which you can reread a couple of times along with the answer in case you get in incorrectly.

Next to the thumbs, you can see a 0, a bar and a 56. This means that this question is the first card out of 56, and that we have yet to get good or bad answers, which is why the bar is grey.

SB progres

If you look on the right hand side, you can see that the bar is no longer fully grey; we see the progress over time. The green marks are correctly answered questions while the red ones are incorrectly answered questions. This bar also allows the user to know that they’re a bit over a quarter done but not half way through yet. Hence, it gives a general idea of how well your studying session is going.

This is the final breakdown when you finish studying. Cool, huh?

SB %

The application also has a built-in quiz creator. You can choose to do it multiple choice, where different answers (definition) from everything you’ve entered in your queue cards show up or you can use the true/false option.

SB 3   SB option test

Last but not least, you can stay connected with your friends and share with them when you’ve studied, the score you’ve gotten and such. You can even share the cards you studied. Quite a motivator!

SB share

This was the iPhone interface. Now, the iPad one:

Last but not least, the website interface:

Some people aren’t quite feeling the StudyBlue vibe. Many feel that the online website interface is too crowded and the animation between flashcards is distracting. Plus, if you aren’t used to ditching the pen and paper to study and write down your notes on your computer, it can be quite hard and time consuming to change to online flashcards. Last but not least, it was pointed out that smartphones and such deal with StudyBlue quite magnificiently but any phone that is a bit older has to go through the hassle of opening the regular StudyBlue website and painfully scroll around to try and read anything.

Others like it quite a lot. Many highlight the cross platform interaction and nice mobile interface. The fact that it is portable and on the go is a plus for a lot of reviewers because students are so often on the go themselves! For the iPhone and Evernote user, StudyBlue has a function to convert the notes in flashcards, which is a much appreciated and useful feature. PC users will also be delighted to know that Powerpoint, PDFs and DOCs can also be converted in flashcards. As mentioned in the cons, this is an application that students who are used to typing on the computer will love. Many technology savvy students will spend much less time to get more done if using an application than pen and paper.

Here is a complete positive review regarding Studyblue which introduces some teaching ideas

 Obviously, the main application in the classroom for StudyBlue is to have your students use it to study your material. They build their own flashcards, they share with each other, they study for the test, voila.

Following along that idea, maybe you could be the one creating the flashcards, instead of giving hands-out. You have them study information in a review sheet before coming to class, a bit like in flipped classroom (maybe along with a video?)  and they come ready in class to actually consolidate what they learned and practice it. Then, they leave the classroom with you having shared another set of flashcards that will prepare them for the day they have a test. Having them study in such a compartmentalized way over a long period of time will truly help their brain retain the information.

Another way to exploit that idea is to have students document themselves on subjects as they would for an oral presentation then have them create flashcards for their peers. They will then share the information with them and instead of standing in front of the classroom teaching a subject they don’t know a whole lot about, they have the time and ability to create something with more substance that will benefit the class long term.

Let me know if you try it out or if you have other application ideas!

You be the hero now, okay?

Anyone remember those books we read as kids, where you’d read an event or a description, then you’d have to make a choice regarding your options, which would send you at this or that page? Sometimes, you’d end up dying. Others, you’d end up fighting monsters. In the end, the point was, you were the one influencing the story. Fun times, huh?

Why don’t we bring that back?

I present to you, Inklewriter.

Image

Inklewriter is a free online application where you get to write your own interactive stories. You do so by simply writing up the initial setting, just like a regular story, then allowing for a few different options as to what the reader can do.

Here is the setting of the story I took 10 minutes to write to learn a bit about the tool:

Image

The little arrows on the right allow you to write the rest of the story if you follow that path.
The Add Option underneath, obviously opens a new path, just like the one we can see as 3rd option, which I left empty

Image

I chose the “get to the truck” option, which we can see in the picture, up above.

As you can see in the bubble which joins the two paragraphs, they are linked. If I click on the bubble, because I put this paragraph for the wrong answer, maybe I thought I had clicked on another option, I will create a “loose” paragraph, which I will then be able to link with the correct answer. No need to lose anything you’ve written, or rewrite the whole thing!

If you look at the setting of my story, right above the answer choice, you can read, in red, “2 links. 1 loose end.” That means that out of the 3 answers I made available, two have an “answer”, and one has no where to follow up to (remember how I created a blank space to show you how the add option showed up? thats the reason why I don’t have a follow up.)

To fix that, simply click on the content section on the right …

Image

… and this little window appears! You can click directly on the section you want to change, and you’ll get to that section. Now, I want to see the “you were really unhappy…. treated this way” option, so I click on it (it becomes yellow in the content section) and this shows up:

Image

Now, with that option, it is quite easy to see where I’m at compared to every possibility for the story (look at the right) and I can see what path exactly I’m following (look above). Quite easy, huh ?

If you’re like me and you aren’t quite sure that you like the way the options are presented in the content section, since you can’t really see one path from another, simply click on it’s neighbour “Map”

Image

Can’t really get lost now, can you, with all the color, the sections, the bubbles that make it very very clear what is going on.

I’m quite certain this is the part I prefer, since it makes everything crystal clear.

If it is not crystal clear to you what I’ve been talking to you about, you should really look into the “A Tutorial Story“, provided by Inklewriter.

Image

It pretty much speaks for itself. Well, I mean, you’re the one choosing, but you know, like, erg… never mind …

Now, why am I talking to you about this tool, you’re probably asking by now.

Well, some, like a blogger called Jpon, believe that InkleWriter is a tool that is basically garbage. He goes on to say that the whole idea of being a writer is to work hard and not to see the writing process as something that should be done by a program for you and that inklewriter, with their idea of “help[ing] writers tell interactive tales with the minimum of fuss“, disrespect that and the writers using it do the same. Now, if it was simply up to him, I wouldn’t be presenting this tool to you guys.

Others, like Emily Short, who have a bit more experience with interactive writing, tend to like inklewriter. She values the easy access to InkleWriter where, unlike other similar platforms, you don’t need to download a program, or spend a few hours learning how to work with the tool (my little short story is a testimony to that). Plus, she likes the different, user friendly ways to display the story, which make it great to keep track of our project. She does mention that a very big project with this tool would be a very hard thing to do, but that’s not how I think the tool should be used.

I think the tool is great. It is quite easy to use, it is user-friendly, and it doesn’t take a whole lot of time to get used to the interface or the different options.

It has great potential for classroom applications. It is a very good tool to use with your students to develop their logical, computer and writing skills. Plus, it is readily accessible, without the need to download a program or to watch a few tutorials to wrap your mind around the tool. Hence, your students will be ready to work on their own story in less than 30 minutes. Go ahead and have them write a story each, where they must exploit this or that characteristic of a story that you just taught them. Or, since you were working on a specific historical era, you can have them write a story that would take place in such a setting. I think a great way to work on creativity would be to start a story for the classroom yourself, then every day, as a group, or as individuals, they/you will need to add 3 options in the story. Watch how quickly the story grows to become complex and intriguing. Hence, the projects won’t be too big, but they’ll be quite meaningful and interesting. Pretty refreshing for you and your students, too!

Hmmm… What if we add an “interact orally” part to this project? Simply have the students work in pairs or teams to create the story, then they will become storytellers, with the other, or the class, choosing what they want to do next.

Pretty different thinking huh? Hit me up with new ideas when you think of them!

Going paperless, huh?

You know how I was just talking about going paperless by using the iPad and all. Well, maybe I haven’t been all that honest with you … I need to tell you that… that…

I have a lot of trouble actually leaving my agenda behind.

girl-crying_l

It’s just hard you know. There’s nothing that can really replace my agenda in my heart;

it’s there when I need, it always knows what I need to do, I know where I’m headed with it down the road…

SONY DSC

In my quest to go paperless, I decided that I would break my routine and stop being loyal to this paper agenda.

I am a Mac and iPhone user, so the next logical step was to try out the electronic schedule manager that comes with it, right? Well, I did, and after a month or so, I was so utterly lost regarding what I needed to do that I stopped using it. It just wasn’t cutting it; it was like my old high school agenda where it was so simple that there weren’t any way to be truly organized with it. I mean, it’s great to remind you to go to the dentist on Tuesday 8:00 in two months, but otherwise? I didn’t find any true advantage to using it.

Unknown

After that failure, it started smelling a lot like freshly pressed paper. I had to find something else before temptation got too unbearable.

struggling-with-stress_364x200_98059549

The very same day, I found iStudiez, and I never turned back.

Simply a few days with iStudiez lite (free), I knew it was what I needed. It would work even better for students! You can add semesters, classes, teachers, set up logos and descriptions, time, location, etc., for every one of them, and iStudiez will build your schedule for you. Plus, you can even make it pretty and visually easy to know which class is which with different colours for every class. It has many features, which are all  presented on the iStudiez website, but what I like best out of all the advantages that it has is the way your data is presented. Indeed, you have an assignment tab …

Screen Shot 2014-03-05 at 11.22.48 AM

…. that if you keep up to date really make it easy to keep track of your workload. If you’re a student, when (if) teachers give you a relevant list of what is due when for the whole school semester, you can simply write everything down. If you’re a teacher, you can either keep track of what you have to do as a teacher, or you can also add the homework you plan on giving your students to keep track of and to see if the workload is doable and meaningful. Plus, as you can see in the screenshot I took, you can set up what’s due for when and it will, depending on your preferences, put your assignment in dark, virtually un-ignorable, red if you forget to do it and it’s overdue. Now, it’s quite impossible for you or your students to say that you didn’t know what was due when !

Screen Shot 2014-03-05 at 11.30.37 AM

Plus, if you enable this option, it’ll keep track of how much you got for what assignment and give you a general grade, too! As a teacher, it may not be the most relevant feature, but you can still see the value for your students.

Screen Shot 2014-03-05 at 11.34.35 AM

This is the overview of your calendar once you’ve created it with iStudiez Pro in the planner tab (we’ll come back to this in a second). As you can see, you can customize pretty much everything from the colour to the title passing by specific times and locations. Plus, if you remember from my earlier screenshots, you can link assignments to classes/type of tasks to keep everything neat and nice. You can also sync it with the built in calendar, so you remember that dentist’s appointment at 8:00 on Tuesday.

The last part I’ll walk you through with the help of this video is the planner section. Listen carefully, then you’ll have all the knowledge you need to start off this semester/year/rest of the year in the best way possible!

So, as you can see in the video or in this screenshot if you’re not a fan of audiovisual supports….

Screen Shot 2014-03-05 at 11.48.41 AM

…the planner section is quite easy to figure out. Everything is customizable and you can create repeating events which allow for easily manageable agenda. Plus, there’s no reason why you should get lost getting to your classes, as the location can be added in! (plus notes, if you’re a mess with directions).

This pretty much covers the iStudiez pro application for what I find most useful, though there are many more features such as sync able and cross-platform features that I didn’t talk about. Simply try the lite version out and get back to me about it, okay ?

Note: If you’re not completely sure about my newfound faith in iStudiez pro, check out this post. It’ll help put things in perspective. Best of luck!

I hold the world in my hands

iPads in the classroom is a big project. It can be (it freaken is) very intimidating, and we’re not always sure where to start at, what to really think of it, and even if we really want to think about it at all. There are so many do’s and dont’s in the classroom, in the technology world too, we’re not always sure we want to change the perfect, stable environment we created… what if the balance explodes and we lose all the control and certainty we had?

A concentrated gamma ray strikes a planet, increasing the core pressure literally tore it open.

Well, ladies and gentlemen, this is just fear talking. This is just as any other project can/could/will be. You just need to rationally think it through and see the advantages and the possibilities. I must admit I was freaking out when I was asked to think about this type of project. It’s so big and costly! This is a life and death decision! What if it ends up like most smart boards in classes, just being used as fancy, expensive projectors instead of used to their true potential?

Hold up. Read this. Come back after.

Image

Feeling better? Me too.

This amazing article comes from this website where you can find everything you could possibly want regarding the possibilities for iPad in the classroom. I won’t go through everything that is possible to do with the iPad, as I’d need a whole website dedicated to just that, but I will highlight the things I find most useful about the iPad in the classroom.

One of the things I like best about the iPad is the fact that you have everything on hand instead of having to break your back every single time you go to class. Don’t forget your book or your dictionary, either, you won’t be able to follow in class and you’ll even get some kind of punishment for it!

Now, it’s a thing of the past.

What are all those little icons going in the iPad, you may be asking yourself. Well, those are applications.

There are tons of applications for education, and there’s even an ESL category on the iTunes store!

See for yourself

Image

This is a screenshot I took of the English as a Second Language section of the iTunes store. As you can see, there are sections such as “reading”, “vocabulary & grammar”, “speaking & listening” and, a category which isn’t showing up on my screenshot, “dictionaries”. This serves to show that you can really use an application for anything you might need.

Did you notice? Many applications are free, too!

Too many applications to choose from? Many blogs review, list and talk about different applications that can be used in the classroom; Simply google search it! If you’re a visual person like I am, you can also go to iPadagogy youtube channel for a ton of application reviews. Or, you can simply try out the “light” and “free” versions of the applications before actually buying one, to make sure it fits with your teaching style and your grade level.

Sure, I talked about making management easier on my TeacherKit blog post, but you also have a lot of interactive content to work with. Let’s say you want to do a group project on endangered species; instead of having to go to the computer lab, wait 2 years (a bit of exaggeration) for the old dinosaurs (umm computers) to turn on, have half of them shut down after 10 minutes of half working, a quarter not being able to connect to the internet, having to put 4 students on the same computer, then give your instructions and have the bell ring … you can simply let them have an iPad. They know how it works. If they don’t, after having them for a day, they’ll have it pretty much figured out. Plus, it is so user friendly, they’ll get the idea after a few minutes of fiddling around.

So, endangered species project with iPad. You can use this free application to get the students to learn a bit more about what is an endangered specie and to learn more about particular species. Then, you could have them work on their iPad to create a short and sweet, engaging presentation together and have them present it to their classmates. They will be very proud of their work, everyone will learn about many different things at the same time and they will all have access to the presentation on their iPad! (no more I-can’t-read-what’s-written-in-diagonal-characters-8 presentations on a cardboard). This can easily be done in a period with the use of the iPad. If you didn’t have the iPad, it would probably be a month’s do at home project, right?

There are a thousand things to do with an iPad in the classroom, all you need is a bit of knowledge, creativity and time. It will make your normal, time-consuming projects (think acetates created from a to z) much faster, user-friendlier and clearer. Plus, it’s eco!

There are many many more very creative and exciting ideas for iPad in the classroom here if you need a bit of inspiration.

Give me some feedback when you implement the iPad in your classroom, alright?

PS Just an idea to blow your mind a bit more… If the students don’t have to haul around big books and pencils and etc. (which well add up to an iPad’s price after a couple of years), maybe you won’t need desks anymore… What would you do with all that space? (that thought is so revolutionary that I can’t even seem to find a picture of a classroom without desks or tables in google, so here’s another thought:)

12-Compelling-Reasons-We-Should-Rethink-School-Desks

The 2.0 Classroom management tool

I belong to a generation of teacher who believe that paperless is best. I can’t help but agree and follow along. Why waste a ton of paper on things that could easily be tracked with an application or a program? Anyway, the way I am organized (or disorganized, if you prefer), means that sooner or later, I will lose that precious piece of paper where it was written very important things I wanted to tell the parents that I can’t quite seem to recall. So, how exactly do I achieve that without breaking the classroom’s / my personal budget?

Image


I present to you, TeacherKit.

This application is as customizable as you’ll need it to be and is pretty awesomely complete for a free app. Plus, applications are quite easy to download!

Never had to download an application before? Never heard of TeacherKit’s features before? Follow this, quite simple!

Here are the key features of this application which will change your teaching world:

  • Customize your classes – each class gets a door on the start up menu for easy access
  • Track students’ attendance – the basic settings are “absent” or “present”. All you have to do is tap on a student’s image in the “attendance” tab and it will change from one to the other AND track the student’s attendance. Plus, if you want to add more options, i.e. late or sick, you can do that through the option menu. Hence, you can have statistics regarding every student and you don’t have to prepare a binder that takes up space – it’s all online!
  • Track students’ behaviour – knowing how your students are acting has never been easier. You simply tap on a student’s picture to trigger the menu and write down notes. Then, like in the attendance menu, you can get statistics
  • Grade book – no need to keep excel sheets that were created by your coworker 10 years ago because you are never sure how to create them yourself! Now, you simply add numbers to the table and you get a general overview, list and averages. Plus, you can turn on the option to see the student’s average at a glance with colour-coding. It shows up next to their picture on the class’ menu.
  • Customizable class menu – set up your student’s picture in the same way your classroom is set up! Whether they’re in rows, a clutter or a circle, you can do it however you want. Quite useful for substitute teachers, too!
  • Add student picture – easily recognizable, a picture is worth a thousand words. However, uploading pictures tend to be a real pain, what with having to pick them one by one and upload them to the correct student… which is why TeacherKit added a face recognition tool! Simply use a class picture instead of individual pictures and you will be on your way!
  • Add student email – once you have added in all the information for your students, you can mass mail them; sure, you can do that right now, but on different platforms and it annoyingly never works for one or two students. Now, you can be sure it will work and if it doesn’t, next time you log in, it will pop into your mind; you won’t wait until afternoon recess when you check your email to remember.

Want to know more about the tool’s possibilities? Here and here you can get the whole thing narrated and simplified for you!

The reason why I like the tool is that it is cheap (read: free), efficient and it does it all. I hate to have to go through different applications or programs to manage my classroom. With TeacherKit, everything’s on hand, at the same place. Plus, if you aren’t too much of a iPad hog, you can even let the substitute teacher keep statistics, notes and etc. on how the class went; no need for a tons of post-its on your desk when you come back from a sick day. The application does it all, and it’s free! Who could ask for more?

Followup on the pessimism

I know I know. That laptop post was a bit harsh and pessimistic. When I reread it a couple of weeks later, I figured I’d try to find a way to fix things. Otherwise, I might turn into the grumpy old teacher who only whines about others but doesn’t improve.

470_2532727

So, how will I fix death by powerpoint?

Prezi.

I had heard of it before, even experienced it in class when some of my fellow classmates or teaching assistant risked it, but I had never tested it myself or even documented myself regarding it’s possibilities and advantages.

Today was the day.

First off, I read the do’s and dont’s of Prezi to get a general idea of its worth. I realized it was a lot like Powerpoint, which should make people who are less techno-savvy feel more comfortable. Furthermore, it is much more lively in the classroom because it shows the link between ideas without having to textually write it down; movement does it for you. Plus, it allows you to connect your ideas and keep that connection when you send your Prezi to your students; they won’t have to wonder and chat with each other to remember what the heck you were talking about.

If you are starting from scratch as I was, you might be feeling a bit lost at this point. Why am I making such statements? How could I know, having spent only a few hours reading on the subject? Go experience a Prezi, wether with that link up top or here.

Once you know the basis of the program and you’re convinced it’s a useful tool, since you brushed against a well-made, interesting Prezi, you might be wondering what more you would gain from learning to use this tool.

Well, one major advantage compared to other tools is the fact that you do NOT need to be online to use it. You can simply download it on your computer  and edit it on the go, just like that video shows!

Now that you like the tool a bit more, here’s a bit of inspiration for the classroom:  you can use a picture as a start off for a discussion by zooming in on a particular part of it then zooming out, exploring the context with the students. Or, you can test student knowledge by asking them to make a Prezi as a support for their oral presentation: it would be impossible to put every single word they will say on a Prezi, unlike on the Powerpoint tool, because it would simply be too time consuming.

Once you know your way around and believe you are good at using Prezi, you should make sure not to get in the same loophole as people do in Powerpoint. They forget the simple rules of thumb then they end up not caring what the final product is. By always trying to improve your presentations, you will make sure to keep yourself on your toes and to keep being interesting. So, keep up to date with the perfect rules, and subscribe to a blog about Prezi or even better, their youtube channel, okay? 🙂

Is that what the voice in my head should sound like?

We all have them. «Students…who…uhm…have…trouble……what’s that word?… oh!… readingatacorrectpace.» It hinders the class’ reading rhythm, and it makes everyone, including you, zone out completely and forget immediately what was read. You try helping out, telling them to read more, or to practice reading aloud, but you know these won’t really make a difference.

Anyway, there’s nothing more you can do, right?

Wrong.

You can actually help students who have trouble in reading in a way that you never thought of before. Think. Did you forget an option? Have you really tried every single possibility? Could you have forgotten…

Audiobooks?

What? No! These cost a ton, and there are no interesting books for children. It doesn’t make sense.

Guess what?

Wrong again.

There are plenty of free audiobook websites.There’s actually a great choice of books for children. Even Scholastic knows it. There is OpenCultureKids Learn Out Loud, StoryNory, Lit2Go, …there are tons !

Free huh?

Image

Audiobooks have huge potential. They allow for students to hear correct, fluent reading. This has the possibility of making the whole «just practice reading aloud» make a lot more sense. Furthermore, imagine the potential of learning that way in a second language classroom.

Sweet.

But wait.

Won’t we be wasting a whole lot of time in class just to hear someone mumble something I can already say?

Sure, you can read it aloud, but being exposed to different accents, intonations and pace allows students to develop a better ear and develop their own style! Plus, you already talk so much, why don’t you give that voice a rest?

No !

Well, fine then. Simply use the audiobook as a second exposition to the book: make them listen to it after they have read this part of the book at home. Then, the day or so after, read it with them, making the book come to life with somewhat okay acting skills.

Sorry, you’re not Johnny Depp.

Image

This makes the whole experience much more interesting  to students who dislike books, and you’ll probably have a good laugh out of it yourself. Students will have fun, instead of thinking that books are boring, bland, one-dimensional things. This could have an extreme influence on their literacy skills in the long run!

Think of how proud they’ll be when they graduate with honours.


Image

Sure, Audiobooks themselves won’t have that effect, but the way you use them and present books to the kids could really have such a huge impact. Reading allows for development of vocabulary, of correct syntax and of their own critical thinking. If you make it as fun as watching TV, they won’t have a choice but to love it.

 Image

You can’t turn Romeo and Juliet in the Simpsons, I know, but giving that extra dimension to the books might just be what the kids need.

How about you give it a try and comment below, alright?

What’re you looking at?

A few of my teachers here at University don’t allow us the use of laptops in classroom, as they are «disturbing, to both you and your classmates. » They say that laptops are too often used to distract ourselves from the subject at hand. They fear that they will lose everyone’s attention and focus if a screen other than theirs is turned on. They feel the same way with cellphones, almost implying that they are evil tools that are on the verge of taking over our minds and education.

 That is bullsh… not true.

If integrated properly in a classroom, laptops and cellphones are the best thing that ever happened to you. Sure, if you only put up a PowerPoint up front and read it, you may feel that your students aren’t listening because they are looking at their laptop. That’s not the laptop’s fault. It’s yours. If the laptop wasn’t in front of them, they’d still not be listening; they’d be doodling or thinking and talking about their weekend or reading articles for tomorrow or …

What you have to understand is that you cannot simply expect students to listen in a class where you are reading aloud what was written in a book that you put on a PowerPoint. Even that sentence evokes a boring experience, imagine sitting through 3 hours of it!


Put technology to your use.

Instead of a PowerPoint filled with every single thing that you are going to mention, use applications and programs like Prezi which will allow you to put in key concepts and keep the students’ attention alive by making the concepts move around and keep their brain working by showing tangible links between the concepts.
They will follow your teaching with their laptop. They will watch the Prezi, or look at the video, or take notes in that document along with you.


You will have their attention.

If the task is interesting enough, they will not steer in another direction because they have a laptop. They will focus, they will like it and they will laugh. Technology will simply come to aid in making your life easier, freeing your hands so you can walk around the class, even make gestures, instead of standing still hidden behind your own computer to show a boring, bland presentation of something they have already read. Using fun applications and not writing everything down will allow you to feel more secure about the fact that you are going to put this class’ notes on the portal: they will still come to class, listen to you and even… enjoy it.

It will even improve their skills.

They will improve their organizing skills, as they will be putting notes in a document that was not built by them but that will be used for their own use. They have to make it simple, effective, and personalized. They will improve their organizing skills in another way because they will need to keep their folders organized, they files clean and the computer free of malwares. Furthermore, there will be no more problems of handwriting that cannot be read, papers that were lost, and team mates who are sick: everything is at hand, put on the classroom’s website, or in the teams’ email folder and they are crystal clear when it comes to understanding how the document is made and what is written in it.

I am pro-computers.

As you have guessed, I am strongly for allowing students to have their computers in class. Of course, you will need to adapt your teaching, as you would with any tool, because that tool allows for freedom of students. If you are not using it properly, if you are boring and if you do not integrate it in your teaching, that computer will be a distraction. However, it is also a window to the world of organized note taking, easy project researches, dictionaries and information.

The possibilities are endless.
What are you going to do to grasp them?

Facebook and … education?

Facebook as an education tool?
Hmmm.

The first thing that comes to mind is: Why? Then, aren’t there many disadvantages, like the problems of privacy settings, the possibility of awkward contacts with students?

Won’t it look like I’m trying too much to be cool?

Those are normal questions, and I’m sure they popped in your mind, too! However, after a little research, I found quite a few ideas that are worth considering.

Here are a few of many advantages of having a class Facebook group.
(Don’t know how to set up a Facebook group for your class? Here’s how!)

By being in their world, they cannot ignore new information coming through the group, as they pop up on their news feed. Watch out! Don’t post too much, that’ll make your posts go in the same category as “ads” in their head: annoying and uninteresting.

You can ask poll questions regarding what they would prefer to talk about in class, or how they found the class today, or if you should allow more time for exams, or … pretty much anything class related. Think! It will allow you to complete stats automatically and know exactly where they stand. You’ll know how to better connect with them and what subjects would spark up great debates in class. You can always keep the poll options open if it is a really broad question!

Keep everyone updated on the class plant, or pet, or project, or …. by posting weekly reports of the project with photos and the whole deal. Then, a review or a summary of the project at the end of the year is much easier to do. Plus, you’ll be able to really know if the project was worth the time and the hassle or if it’s just something that the students really want to do. How? You’ll know if they like the photos, if they comment on them, if they talk to you about the update, if they want to participate in reporting on the project, etc.

Post team projects for future reference, to help students see the big picture or simply to be able to compare the level of investment each group put in. Plus, no more “I forgot it at home!” or “But X and Y are sick, they are the ones with the papers!”… it’s all there for everyone to be able to get the project, no lame excuses.

Keep updated with the non-profit organization the class decided to get involved with by liking their page or asking members of the organisation to post on the group every now and then. Kids and teens alike will be able to truly grasp the effects of their efforts!

Keep everyone posted, not just the students! Working on specific themes that involve historical or fictional characters, real life events, journalism or worldwide event (think Olympics)? A class Facebook group is the perfect thing to keep students posted and interested… parents, too, can see the project, if you let them! Then, you’re not the random teacher that does not seem interesting, you’re Mister A or Miss D that allows them a window into a piece, a part or the whole class production and environment.

At first, like you, I wasn’t quite sure it was the greatest mix to do. However, I have warmed up to the idea of using Facebook as part of my future teacher career because I can see the many advantages it brings, and I can live with the consequences. I’m looking forward to using it in my future classes, and I will keep you posted on my fails, wins and all!

Need more inspiration? You can click here or here!

Still unsure it’s a good idea? Click here or here!

See you next week for my blog post about Education and … IWB!